


Bathroom Design Ideas
 We all love a pristine new bathroom – gleaming taps, shiny new bath, elegant tiling, clean white grout, soft fluffy towels. Sadly, in reality, our bathrooms tend not to look like that unless we have recently moved house to a new build. The taps have limescale staining, the grout is starting to discolour and the sanitary ware and tiling is no longer gleaming. But it doesn’t have to be like that – refurbishing your bathroom is a relatively inexpensive job providing you don’t have to move pipework, and if you are on a really tight budget then you can give it a facelift that will transform it – what are you waiting for?
Preparing to Tile Your Bathroom
Tiles on both the walls and floors are the most practical solution in any bathroom – they are hard-wearing and waterproof – but more than that they are also a beautiful element in any design scheme. Wall tiles and floor tiles come in an enormous variety of styles, sizes, colours and textures and can be used in a variety of layout patterns to give your bathroom a unique look.
Unlike the plumbing required when refurbishing your bathroom, installing tiling is a task that you can do yourself if you are fairly competent at DIY (or know someone else who is). All you need are a few special tools and the correct adhesive and grout for the tiles of your choice. The type of adhesive will depend on the surface to which the tiles are being applied and, naturally, on the tiles themselves, whether they are ceramic tiles, porcelain tiles or natural stone tiles. Your tile supplier can advise on the most appropriate adhesive.
The grout you will need is dependent on the width of your grout joints between each tile and whether it needs to be waterproof. Wet rooms will always require waterproof grout but in a regular bathroom only the shower area needs grout that is waterproof.
And as far as tools are concerned the following are essential items:
– Tile saw
– Spirit level
– Tile cutter (for cutting tiles around curved shapes)
– Wooden guide batten (to align wall tiles horizontally)
– Tile spacers (small plastic items to ensure even joint widths)
– Tile nibblers (pliers for shaping tiles around awkward shapes such as pipes)
– Grout spreader
– Adhesive spreader
You are now ready to start preparing the surfaces for installing the tiles. Every surface to be tiled needs to be thoroughly cleaned and dried. Remnants of wallpaper or paint should be removed where possible or sanded down to remove any loose scraps. Large cracks need to be filled and then sanded smooth and any noticeable dips in the surface need to be filled to make it level. Similarly any large raised areas need to be sanded down to ensure the tiles can lie flat on the surface. If you don’t prepare the surface well then the tiles will not be level and will not stick properly to the walls or floor.
 If you are fortunate enough to be tiling onto new, bare plaster then there is less preparation to do but it is necessary to apply a primer first to seal the plaster and prevent the tile adhesive from soaking into the plaster and preventing good adhesion.
Once all the preparation has been done you are ready to begin marking out your tile layout.
Discover The Best Way to Layout Bathroom Wall Tiles
Sticking tile adhesive on the back of a tile and fixing it to the wall is a relatively easy task as part of refurbishing your bathroom if you have prepared the surface properly and chosen the right adhesive but there’s more to tiling a wall than simply sticking the tiles on. To get a really professional look you need to make sure that you fix the tiles in the right position – you don’t want to end up with a narrow strip of tile at the ceiling, or worse, just above the bath where you will notice it every day.
So what do you need to do to decide on the best position for your tiles?
It’s not difficult – just start by marking a horizontal line all around the middle of the room with a pencil and spirit level an equal distance from the floor and ceiling. Now check where that line lies in relation to the sink, bath, window and any other obstructions that will break the tiling line. There are no hard and fast rules about which level is best because tiles come in so many different sizes – you simply want to avoid ending up with very narrow strips of tile anywhere in the room if possible but especially where they will be noticeable.
Measure downwards from your central line until you reach the bath and work out how many tile heights that will be not forgetting to allow 2-3mm for the grout joints). If it leaves less than half a tile immediately above the bath then move your central line up until at least half a tile sites just above the bath. Now measure in tile heights above the new central line up to the ceiling – depending on the height of the tile section left at ceiling height you may have to play around with your central line until a good compromise is achieved – just remember that narrow sections are less noticeable at ceiling height so if you do have to compromise do so away from direct sightlines.
In the same way mark your vertical guideline in the centre of the largest wall and adjust through trial-and-error to ensure that the corner you see as you first come into the room has full tiles either side, if possible, and that all other corners have at least half a tile width on each side. This is not always as easy as it sounds but take the time and trouble to get the layout right before you start tiling and the end result will be perfect.
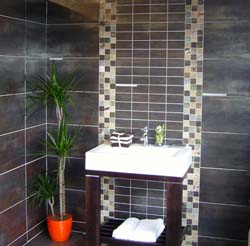
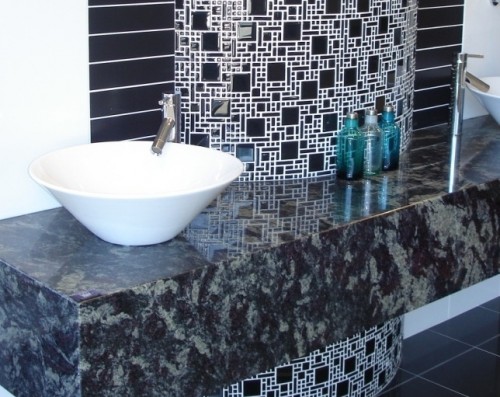
And for inspiration take a look at this favourite pic of ours achieved with bright mosaic tiles and large porcelain tiles for a simple but highly effective design.
If you have any tips and tricks that you have used to get a prefect tiling layout in an awkward space like a bathroom why not let us know in the comments section below.
Don’t Forget
It doesn’t have to cost the Earth to revamp your bathroom – look out for ends-of-lines or discontinued stock for tiling and ex-display models for that luxury bath. Plenty of opportunities to keep the cost down…
Some Inspirational Photos – Ideas for bathrooms of all shapes and sizes
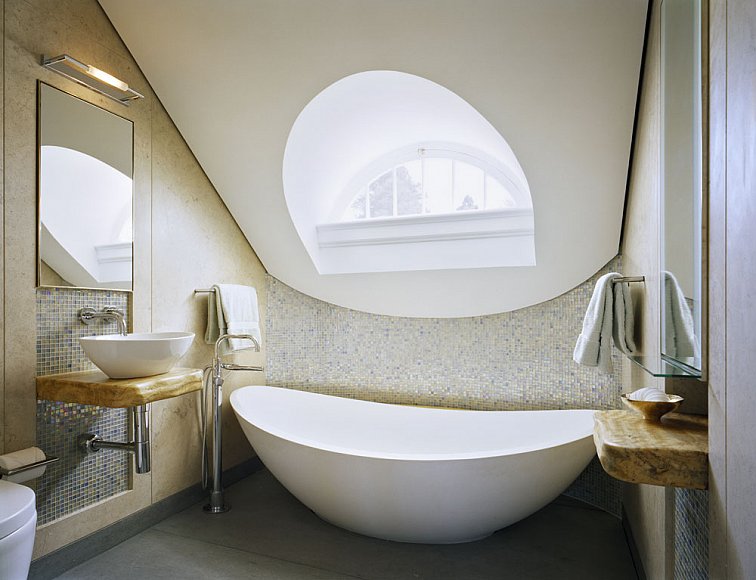
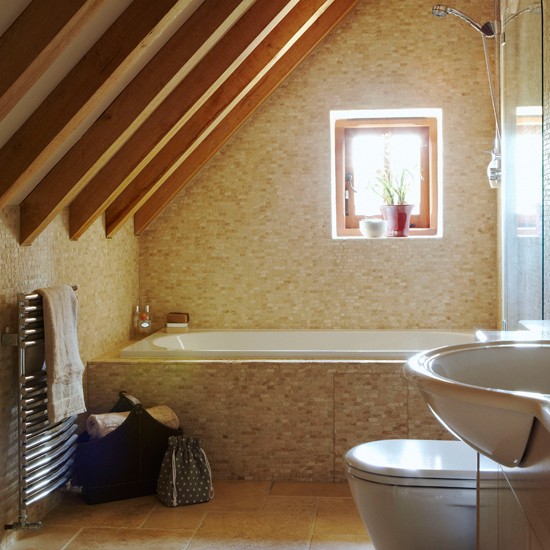 Classic attic bathroom with mosaic tiling
Sometimes you simply need to see an image and you know that is the bathroom that you want. These are some of my favourite inspirational images…
Luxury Stone Bath from Castello Baths
Simply Beautiful Tiles
 These tiles are so unusual they would make a great design statement even in the smallest bathroom. They are manufactured by the Italian company Evit (Everstone in Australia) who make a range of unusual shaped tiles.
More Inspirational Tiles from Evit
More Inspirational Tiles from Evit
I want this bathroom
 Perhaps I could turn the spare bedroom into my new bathroom… Just a thought
Small but perfectly formed
 A beautiful bathroom for a realistically sized space
Dream Bathroom
 Imagine having a light fitting like that in your bathroom!
Masculine Bathroom
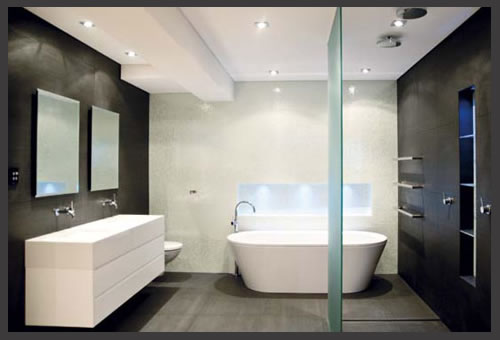 I like this but wondering if it is a little too austere? What do you think?
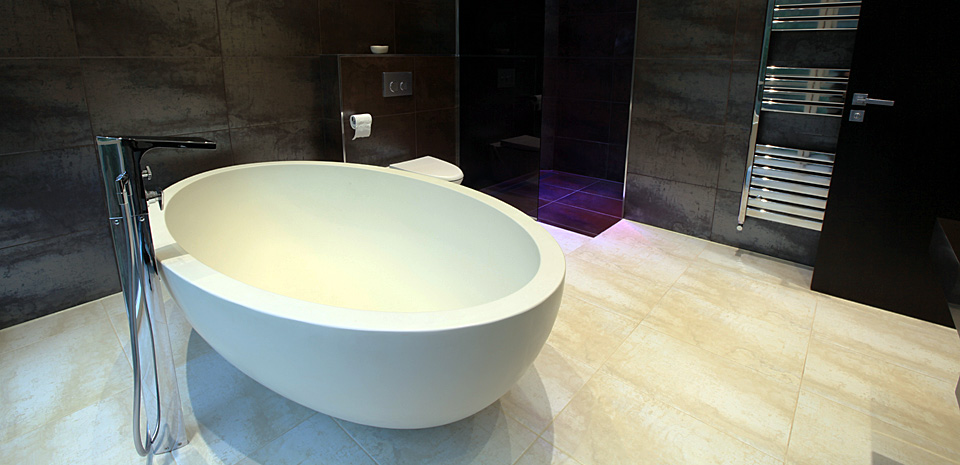
A Bathroom With A View
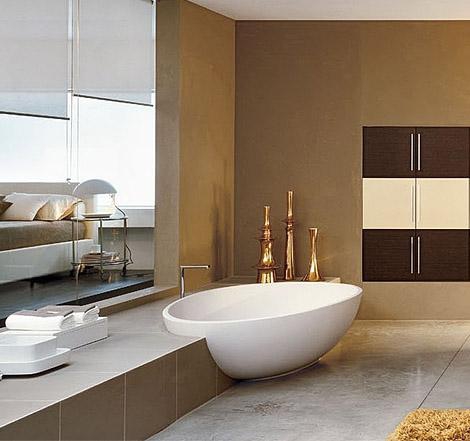 The ultimate in relaxing bathing
Choosing the perfect tiles for your home
There are certain places in the home where tiles on either the walls, floors or both, are the perfect solution. They look great and are hardwearing – outlasting almost any other form of wall or floor covering. Whilst more expensive as an initial outlay, they are a better investment by far than say wallpaper or carpet, both of which will wear much sooner, become dirtier and be harder to get clean. Tiles, on the other hand, are durable and easy to keep clean – many types, such as porcelain tiles, requiring minimal maintenance.
So tiles in general are the perfect solution for a bathroom, kitchen, hallway or conservatory but how do you select the perfect tile to suit your home – here are some essential considerations to help you do just that.
COLOUR
With such a huge variety of colours available in all sorts of tiles it is difficult to say which would be the right colour for a particular home. Current trends will always play a part in any decision but beyond that it really is just personal choice. However, there are some basic considerations that will always be true of certain colours:
* Pale or neutral tiles will make a room look bigger
* Dark tiles will make a room look smaller but are excellent for hiding the dirt in high-traffic areas such as hallways
* Using matching floor and wall tiles will make a room look bigger
* For a contemporary look choose large, highly polished tiles
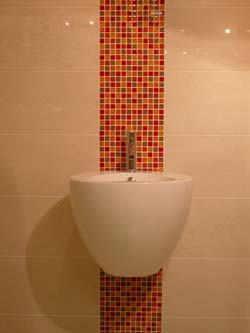
* If you love bold colours but are not brave enough to tile a whole room in, say, lime green, then use the colour as a border surrounded by neutral or large white
SIZE
The perfect size of tile for your project will be influenced by the size of the room itself. Very large tiles, whilst great on large expanses of floor, will require too much cutting to look good in a tiny bathroom. Using smaller tiles in small areas will actually make the space look bigger. But don’t be afraid to mix tiles sizes – using large ones where suitable and smaller ones, including mosaics. in feature areas. When choosing the size of tile always consider the amount of cutting that will be required – even for a professional tiler it can be difficult to cut a tile accurately around awkward shapes.
TYPE
This is the area where we are most likely to be influenced by price because there is such a range of prices depending on the type of tile, with natural stone being the most expensive so you need to think carefully about you budget before choosing your tile type. The main tiles materials are:
Natural Stone
The ultimate in luxury whether you choose granite, marble, limestone or any of the host of other natural stones made into tiles. But they are expensive and some types also require regular maintenance and occasional sealing to retain their good looks so think carefully before investing in natural stone tiles.
Ceramic
One of the most common and versatile types of tiles; they come in a range of colours, textures and designs and sizes, including very large tiles and small mosaics, and are a really good cost-effective choice.
Porcelain
Porcelain tiles are hardwearing and easy to maintain. Because of their hardness they can also be made in very large sizes up to 1.2 metres square and sometimes larger. They are also produced in contemporary designs such as gloss white and very beautiful natural stone effects.
So these are some of the factors to take into consideration when choosing the perfect tiles for your home but remember that everyone’s idea of perfection is different so always trust your instincts and choose what you like.
What started with a bathroom re-design has turned into a whole house refurbishment
Once I had finished the bathroom everything else in the house looked a little tired. It had seemed fine before but there is nothing like a shiny new bathroom to make you dis-satisfied with the rest of your home. So, starting with the bathroom I installed some new technology, installing a high-end waterproof TV from ProofVision in my bathroom. But don’t get me wrong, I love my house for so many reasons: the sunny south facing garden, the spacious living room with a lovely view over said garden, the fact that there are enough loos for every member of the household (got to think of the practicalities) and that I can walk a quarter of a mile eastwards and be in open country or half a mile westwards and be in town.
But still the place was in need of a makeover so I will try and record how I am getting along as best I can…
I’m sure there are plenty of people out there with tips about re-designing a new bathroom, success stories or even failures – let us know…